
Oil Change Tools
Oil Changes are VERY Important!
Regular oil changes are one of the most important maintenance services you can perform to help keep your vehicle’s engine running properly. Fresh engine oil lubricates moving engine parts, reduces friction, helps control heat, and protects against premature engine wear. Over time, engine oil becomes dirty and contaminated, reducing its ability to properly protect the engine. Ignoring oil changes can contribute to sludge buildup, excessive engine wear, overheating, and expensive engine repairs. Performing your own DIY oil change can also save money while helping you become more familiar with basic vehicle maintenance. The oil change tools shown here can help you safely and efficiently complete this important service at home. For more beginner-friendly DIY automotive repair guides, maintenance tips, tools, and automotive information, visit at our youtube channel. DirtyJunkyCar1

Floor Jack
Jack Stands
Jack Stands
A floor jack is a common tool used during an oil change when you need additional clearance underneath the vehicle.
Many cars sit too low to comfortably or safely access the engine oil drain plug and oil filter from the ground.
A floor jack allows you to lift the vehicle so it can then be properly supported with jack stands.
Why Use a Floor J
A floor jack is a common tool used during an oil change when you need additional clearance underneath the vehicle.
Many cars sit too low to comfortably or safely access the engine oil drain plug and oil filter from the ground.
A floor jack allows you to lift the vehicle so it can then be properly supported with jack stands.
Why Use a Floor Jack for an Oil Change?
A floor jack can help you:
- Raise a low vehicle for better access.
- Reach the engine oil drain plug.
- Reach an oil filter located underneath the engine.
- Position an oil drain pan underneath the vehicle.
- Create enough working space to perform the oil change.
Some trucks, SUVs, and higher vehicles may have enough ground clearance without lifting them.
Never lift a vehicle unless you actually need to.
Floor Jack vs. Factory Scissor Jack
A proper automotive floor jack is generally a much better choice for routine maintenance than the emergency scissor jack supplied with many vehicles.
Factory scissor jacks are primarily intended for emergency tire changes.
Do not use a factory scissor jack to perform an oil change underneath a vehicle.
Safety First!
A floor jack is designed to lift the vehicle — not safely support it while you work underneath.
After lifting the vehicle, place properly rated jack stands at the manufacturer's approved support points.
Slowly lower the vehicle onto the jack stands and make sure the vehicle is stable before working underneath it.
NEVER crawl underneath a vehicle supported only by a floor jack!
Hydraulic equipment can fail, shift, leak down, or move unexpectedly.
Also:
- Work on a firm, level surface.
- Set the parking brake.
- Use wheel chocks.
- Follow the vehicle manufacturer's lifting instructions.
- Use the correct jacking points.
- Make sure your floor jack is properly rated for the vehicle's weight.
- Never exceed the jack's rated capacity.
Do You Always Need a Floor Jack?
No.
If you can safely reach the drain plug and oil filter without lifting the vehicle, you may not need one.
Some vehicles also have enough clearance when using properly rated ramps.
The important thing is having safe access to the oil drain plug and filter.
Dirty Junky Car Tip
For a beginner DIY oil change, think of the floor jack as a lifting tool only.
Floor jack = lifts the car.
Jack stands = support the car.
Never confuse the two.
If you need to raise your vehicle for an oil change, use the proper equipment and take your time.
Your oil change can wait. Your safety comes first.
Jack Stands
Jack Stands
Jack Stands
Jack stands are one of the most important safety tools when performing an oil change underneath a raised vehicle.
If you use a floor jack to lift your car for additional clearance, you need properly rated jack stands to support the vehicle while you work underneath it.
Why Use Jack Stands?
A floor jack is designed to lift the vehicle.
Jack st
Jack stands are one of the most important safety tools when performing an oil change underneath a raised vehicle.
If you use a floor jack to lift your car for additional clearance, you need properly rated jack stands to support the vehicle while you work underneath it.
Why Use Jack Stands?
A floor jack is designed to lift the vehicle.
Jack stands are designed to support the vehicle after it has been lifted.
During an oil change, jack stands provide safer access to:
- The engine oil drain plug.
- The oil filter.
- The bottom of the engine.
- Splash shields or covers that may need to be removed.
Never Trust a Floor Jack Alone!
NEVER crawl underneath a vehicle supported only by a floor jack.
A hydraulic floor jack can leak down, shift, malfunction, or lose pressure unexpectedly.
If the vehicle falls while you are underneath it, the results can be serious injury or death.
Once the vehicle is lifted, position the jack stands at the manufacturer-approved support points and carefully lower the vehicle onto them.
Always Use Jack Stands Correctly
Before getting underneath the vehicle:
- Work on a firm, level surface.
- Set the parking brake.
- Chock the appropriate wheels.
- Use jack stands rated for the vehicle's weight.
- Use the manufacturer's approved support points.
- Make sure both stands are positioned securely.
- Slowly lower the vehicle onto the stands.
- Verify that the vehicle is stable before going underneath.
Never use damaged, bent, cracked, or improperly rated jack stands.
Do You Always Need Jack Stands for an Oil Change?
Not necessarily.
Some trucks and SUVs have enough ground clearance to perform an oil change without lifting the vehicle.
If the vehicle does not need to be raised, jack stands may not be necessary.
However, if you raise the vehicle with a floor jack and plan to work underneath it, properly supporting the vehicle is essential.
Dirty Junky Car Tip
Remember this simple rule:
Floor jack = LIFT
Jack stands = SUPPORT
Never substitute one for the other.
An oil change may be basic maintenance, but working underneath thousands of pounds of vehicle is serious business.
Support the vehicle correctly before you go underneath it. Your life is more important than an oil change.
Wheel Chock
Jack Stands
Basic Socket Set
A wheel chock is a simple safety tool used to help prevent your vehicle from rolling while you perform an oil change.
This is especially important if you need to raise the vehicle with a floor jack and support it with jack stands.
Why Use Wheel Chocks?
Wheel chocks can help:
- Prevent the vehicle from rolling forward.
- Prevent the vehicle from ro
A wheel chock is a simple safety tool used to help prevent your vehicle from rolling while you perform an oil change.
This is especially important if you need to raise the vehicle with a floor jack and support it with jack stands.
Why Use Wheel Chocks?
Wheel chocks can help:
- Prevent the vehicle from rolling forward.
- Prevent the vehicle from rolling backward.
- Keep the vehicle more stable while lifting it.
- Add another layer of safety while working underneath the vehicle.
A wheel chock may look simple, but it plays an important role when working around a raised vehicle.
Where Do You Place Wheel Chocks?
Place wheel chocks against the tires that will remain on the ground, following the vehicle manufacturer's lifting instructions.
For example, if you are lifting the front of the vehicle, the rear wheels may need to be securely chocked.
Depending on the situation, chocks may be placed in front of and behind a tire to help prevent movement in either direction.
Safety First!
Before lifting your vehicle:
- Park on a firm, level surface.
- Put an automatic transmission in Park or a manual transmission in the appropriate gear.
- Set the parking brake when appropriate.
- Position the wheel chocks securely.
- Use the manufacturer's approved lifting points.
- Support the vehicle with properly rated jack stands.
Never rely on the parking brake alone to prevent the vehicle from moving.
Never work underneath a vehicle supported only by a floor jack.
Dirty Junky Car Tip
Think of wheel chocks as another layer of protection during your DIY oil change.
Floor jack = LIFT
Jack stands = SUPPORT
Wheel chocks = HELP PREVENT ROLLING
They are inexpensive, easy to store, and simple to use.
When you are working underneath thousands of pounds of vehicle, every layer of safety matters.
Basic Socket Set
Oil Filter Wrench
Basic Socket Set
A basic socket set is one of the most useful tools for performing a DIY oil change.
You do not need a huge professional mechanic tool set. For many vehicles, you only need one correctly sized socket and a ratchet to remove the engine oil drain plug.
Why Use a Socket Set?
A basic socket set can help you:
- Remove the engine oil drain plug.
- Reinst
A basic socket set is one of the most useful tools for performing a DIY oil change.
You do not need a huge professional mechanic tool set. For many vehicles, you only need one correctly sized socket and a ratchet to remove the engine oil drain plug.
Why Use a Socket Set?
A basic socket set can help you:
- Remove the engine oil drain plug.
- Reinstall the drain plug.
- Remove bolts holding an engine splash shield or underbody cover.
- Remove small brackets or covers blocking access to the oil filter.
- Handle other basic maintenance around the vehicle.
Metric or SAE?
Many modern vehicles use metric fasteners, while some vehicles and aftermarket components may use SAE sizes.
A small metric and SAE combination socket set gives a beginner several common sizes without requiring a huge toolbox.
Always use the correct size socket for the drain plug.
A socket that is too large or does not fit properly can slip and round off the drain plug.
Ratchet Size
A basic 3/8-inch drive ratchet and socket set is a great general-purpose choice for many DIY oil changes.
However, the exact socket size needed depends on your specific vehicle.
Check your owner's manual, repair information, or verify the drain plug size before starting.
Safety First!
Make sure the socket is fully seated on the drain plug before applying force.
Use controlled pressure and avoid using excessive force.
When reinstalling the drain plug, do not overtighten it.
Overtightening can damage the drain plug, crush the sealing washer excessively, or strip the threads in the oil pan.
Use a torque wrench and tighten the drain plug to the vehicle manufacturer's specified torque whenever a specification is available.
Dirty Junky Car Tip
You do not need hundreds of tools to perform a basic oil change.
A small basic socket set with a ratchet and the correct socket may be all you need to remove the drain plug and gain access to the oil filter.
Start with the basics, use the correct size tool, and never force a fastener that does not feel right.
The correct tool makes the job easier and helps prevent unnecessary damage.
Oil Drain Pan
Oil Filter Wrench
Oil Filter Wrench
An oil drain pan is a basic tool used to safely catch the old engine oil when performing an oil change.
When you remove the engine oil drain plug, several quarts of used oil can drain out quickly. Without a drain pan underneath the vehicle, you could end up with oil all over your driveway, garage floor, tools, or yourself.
Why Use an Oil Dr
An oil drain pan is a basic tool used to safely catch the old engine oil when performing an oil change.
When you remove the engine oil drain plug, several quarts of used oil can drain out quickly. Without a drain pan underneath the vehicle, you could end up with oil all over your driveway, garage floor, tools, or yourself.
Why Use an Oil Drain Pan?
An oil drain pan helps you:
- Catch old engine oil.
- Keep your work area cleaner.
- Reduce spills and mess.
- Catch oil from the oil filter.
- Measure or inspect approximately how much oil was removed.
- Transfer used oil for proper recycling.
Choose the Right Size
Make sure your drain pan has enough capacity to hold all of the oil in your engine.
Check your vehicle's oil capacity before starting.
For example, if your engine holds 5 quarts of oil, use a drain pan with more than a 5-quart capacity to provide extra room and help prevent spills.
Position the Pan Correctly
Oil does not always drain straight down.
When the drain plug is first removed, the oil may shoot outward before slowing down.
Position the drain pan so it can catch the initial stream, and be prepared to adjust it as the oil flow changes.
Also remember that removing the oil filter can release additional oil.
Safety First!
Engine oil can become extremely hot after the vehicle has been running.
Allow the engine to cool enough to work safely before removing the drain plug.
Wear gloves and safety glasses, and keep your hands away from the initial stream of hot oil.
Clean spills immediately because oil can make the floor very slippery.
Never Dump Used Engine Oil!
Used motor oil should never be dumped onto the ground, into a storm drain, in the trash, or down a household drain.
Transfer the used oil into a secure container and take it to an authorized used-oil recycling or collection location.
Dirty Junky Car Tip
Buy an oil drain pan that is larger than your vehicle's total oil capacity.
A little extra capacity can make your DIY oil change much cleaner and easier.
Oil changes are already dirty enough.
Catch the oil in the pan — not on your driveway!
Oil Filter Wrench
Oil Filter Wrench
Oil Filter Wrench
An oil filter wrench is a simple tool designed to help remove an oil filter that is too tight to loosen by hand.
During an oil change, the old oil filter must be removed and replaced. Sometimes it comes off easily, but other times it can be extremely tight, slippery, or difficult to reach.
Why Use an Oil Filter Wrench?
An oil filter wrench c
An oil filter wrench is a simple tool designed to help remove an oil filter that is too tight to loosen by hand.
During an oil change, the old oil filter must be removed and replaced. Sometimes it comes off easily, but other times it can be extremely tight, slippery, or difficult to reach.
Why Use an Oil Filter Wrench?
An oil filter wrench can help you:
- Loosen a stubborn oil filter.
- Get a better grip on a slippery filter.
- Reach filters located in tight spaces.
- Remove filters that have been overtightened.
- Make an oil change faster and easier.
Different Types of Oil Filter Wrenches
Not every vehicle uses the same type of oil filter.
Common oil filter tools include:
- Cup-style filter sockets.
- Strap wrenches.
- Band-style filter wrenches.
- Pliers-style filter wrenches.
- Specialty cartridge oil filter sockets.
Before buying one, make sure the tool is compatible with your vehicle's oil filter.
Do You Always Need One?
No.
Some spin-on oil filters can be removed by hand if they were installed correctly and are easy to reach.
However, having the correct oil filter wrench nearby can save you a lot of frustration when a filter refuses to move.
Safety First!
Make sure the engine has cooled enough to work safely. The oil filter and surrounding engine components may be very hot.
Place your oil drain pan underneath the filter because oil will usually spill out when the filter is removed.
Be careful around exhaust components, sharp edges, and other hot engine parts.
Do Not Overtighten the New Filter!
An oil filter wrench is generally used for removal, not for excessively tightening a new spin-on filter.
For many spin-on filters, lubricate the new filter gasket with clean engine oil and tighten the filter according to the filter or vehicle manufacturer's instructions.
Cartridge-style filter housings may require a specific socket and torque specification.
Overtightening can damage the filter, gasket, housing, or threads.
Dirty Junky Car Tip
Before starting your oil change, find out what type of oil filter your vehicle uses and whether it requires a special oil filter wrench or socket.
The correct tool can turn a stubborn oil filter from a frustrating problem into a simple removal.
Right filter. Right wrench. Much easier oil change.
Nitrile Gloves
Shop Rags or T-shirt Rags
Shop Rags or T-shirt Rags
Nitrile gloves are a simple but important piece of personal protective equipment when performing a DIY oil change.
Oil changes can get messy. Gloves help reduce direct skin contact with used engine oil, grease, dirt, and automotive chemicals.
Why Wear Nitrile Gloves?
Nitrile gloves can help:
- Keep used engine oil off your hands.
- Reduce skin con
Nitrile gloves are a simple but important piece of personal protective equipment when performing a DIY oil change.
Oil changes can get messy. Gloves help reduce direct skin contact with used engine oil, grease, dirt, and automotive chemicals.
Why Wear Nitrile Gloves?
Nitrile gloves can help:
- Keep used engine oil off your hands.
- Reduce skin contact with automotive chemicals.
- Keep grease and dirt off your skin.
- Make cleanup easier after the oil change.
- Protect small cuts and scrapes from contamination.
- Provide better chemical resistance than many basic disposable latex gloves.
Used Engine Oil Is Dirty
Used motor oil collects contaminants while circulating through the engine.
Try to avoid unnecessary or prolonged skin contact with used engine oil.
If oil gets on your skin, wash the affected area thoroughly with soap and water.
Why Nitrile?
Nitrile gloves are popular for automotive work because they are disposable, flexible, and resistant to many oils and greases.
For basic maintenance, choose gloves that fit properly and are thick enough to handle normal automotive work without tearing easily.
Replace them if they become ripped, punctured, or heavily contaminated.
Safety First!
Nitrile gloves provide basic hand protection, but they do not protect against every automotive hazard.
Be careful around:
- Hot engine oil.
- Hot exhaust components.
- Sharp metal edges.
- Moving belts and pulleys.
- Rotating engine components.
Never work around moving engine components while wearing loose or damaged gloves.
Dirty Junky Car Tip
Keep a box of disposable nitrile gloves with your oil change supplies.
Oil changes are naturally dirty, but your hands do not have to stay covered in used oil.
Protect your hands, keep your work area cleaner, and throw the gloves away when the job is finished.
Shop Rags or T-shirt Rags
Shop Rags or T-shirt Rags
Shop Rags or T-shirt Rags
Shop rags or old T-shirt rags are simple, inexpensive supplies that make a DIY oil change much cleaner and easier.
Oil changes can get messy quickly. A few rags nearby can help you clean up small oil drips, dirty tools, greasy hands, and oily surfaces while you work.
Why Keep Shop Rags Nearby?
Shop rags can help you:
Shop rags or old T-shirt rags are simple, inexpensive supplies that make a DIY oil change much cleaner and easier.
Oil changes can get messy quickly. A few rags nearby can help you clean up small oil drips, dirty tools, greasy hands, and oily surfaces while you work.
Why Keep Shop Rags Nearby?
Shop rags can help you:
- Wipe oil from your tools.
- Clean around the oil drain plug.
- Wipe the oil filter mounting area.
- Clean small drips and spills.
- Wipe your funnel after adding new oil.
- Clean the engine oil dipstick.
- Keep your hands and work area cleaner.
Old T-Shirts Work Too!
You do not necessarily need expensive shop towels.
Old cotton T-shirts can be cut into smaller pieces and reused as basic automotive shop rags.
You can also buy inexpensive packs of shop rags online if you want a dedicated supply like Amazon, for your garage.
Keep Clean and Dirty Rags Separate
It is a good idea to keep some rags clean for checking the dipstick and wiping clean components.
Use separate dirty rags for cleaning old oil, grease, and grime.
Do not use a heavily contaminated rag to wipe something that needs to remain clean.
Safety First!
Oil-soaked rags should be handled and disposed of properly according to your local waste requirements.
Keep oily rags away from flames, sparks, heaters, and other ignition sources.
Do not leave oily rags scattered around your garage or driveway.
Also, never reach near moving belts, pulleys, or cooling fans with a rag while the engine is running.
Dirty Junky Car Tip
Keep a small stack of shop rags or cut-up old T-shirts with your oil change tools.
They are cheap, simple, and you will probably use several during every oil change.
Oil changes are dirty. Keep the mess under control with a few good rags.
Funnel
Shop Rags or T-shirt Rags
Funnel
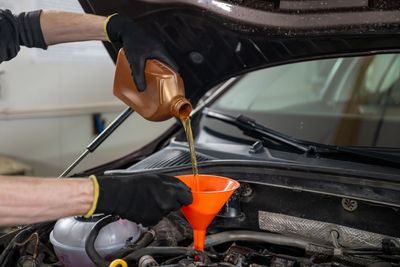
A funnel is a simple and inexpensive tool that helps you pour fresh engine oil into the engine without making a mess.
The engine oil fill opening can be small or difficult to reach. Trying to pour directly from a large oil container can easily cause oil to spill onto the engine.
Why Use a Funnel?
A funnel can help you:
- Pour new engine oil int
A funnel is a simple and inexpensive tool that helps you pour fresh engine oil into the engine without making a mess.
The engine oil fill opening can be small or difficult to reach. Trying to pour directly from a large oil container can easily cause oil to spill onto the engine.
Why Use a Funnel?
A funnel can help you:
- Pour new engine oil into the engine.
- Reduce spills and wasted oil.
- Keep oil off belts, hoses, wiring, and engine components.
- Control the flow of oil while pouring.
- Make your DIY oil change cleaner and easier.
Choose the Right Funnel
You do not need an expensive funnel for a basic oil change.
Look for an automotive funnel that:
- Fits securely into the oil fill opening.
- Has a wide enough opening for easy pouring.
- Is long enough to reach the fill opening if necessary.
- Is easy to clean and store.
Some vehicles have oil fill openings located underneath covers or in tight areas, so a long-neck funnel may make the job easier.
Make Sure It Is Clean!
Before using your funnel, inspect the inside for dirt, dust, metal particles, leaves, or other debris.
Anything inside the funnel could potentially enter the engine with the new oil.
Keep your oil funnel clean and store it with your oil-change supplies.
Safety First!
Make sure you are pouring engine oil into the correct oil fill opening.
Look for the engine oil cap and verify its location in your owner's manual if you are unsure.
Add the correct type and amount of engine oil specified by the vehicle manufacturer.
Do not automatically pour the entire container into the engine.
Dirty Junky Car Tip
A funnel may cost only a few dollars, but it can save you from creating a big oily mess.
Pour slowly, periodically check the oil level according to the manufacturer's procedure, and avoid overfilling the engine.
A $5 funnel can make your oil change cleaner, easier, and less frustrating.